Friday, July 22, 2016
PALS
I haven't been on here too much lately. Some new things:
I adopted Max. He's part boxer and I don't know what else. So far he can shake hands and sit on command.His specialty is the ability to tear his pillow to pieces when no one is looking. Mei's specialty is the ability to sew it back together, over and over.
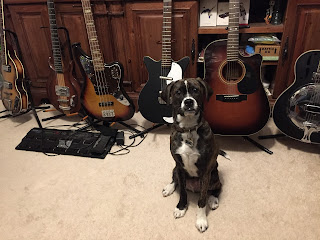
I bought Rosie for $100. Normally dachshunds cost a lot more but she didn't have any papers. I didn't care about that since I wasn't planning on breeding her. I just wanted a buddy. She can almost say "I love you" on command. It comes out as AH WUH WOO. Sometimes are better than others. If I can get a good one on video I will post it.


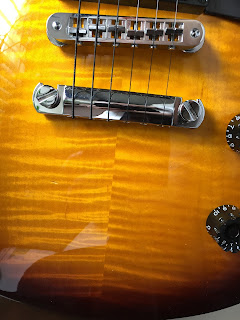
Figured maple carved top.
I adopted Max. He's part boxer and I don't know what else. So far he can shake hands and sit on command.His specialty is the ability to tear his pillow to pieces when no one is looking. Mei's specialty is the ability to sew it back together, over and over.

I bought Rosie for $100. Normally dachshunds cost a lot more but she didn't have any papers. I didn't care about that since I wasn't planning on breeding her. I just wanted a buddy. She can almost say "I love you" on command. It comes out as AH WUH WOO. Sometimes are better than others. If I can get a good one on video I will post it.

I got a Les Paul Studio Pro 120th anniversary edition. It cost me 2 other guitars plus some cash. The other 2 guitars had been packed away and untouched for about 20 years, and amazingly, they were still in tune. One was a Telecaster 50th anniversary edition. Weirdly it was not worth any more than what I originally paid for it. I'd been taking extra care to keep it pristine, and making space for it all this time, and it amounted to nothing. I didn't like playing it because the neck felt too thick to me.

Figured maple carved top.

Monday, November 10, 2014
HOW TO GET THROUGH A RED LIGHT LEGALLY
I don't really know if this is 100% legal. I've never tried it but I've wondered about it ever since I was a kid and learned it was okay to make a U-turn in the middle of the road.
Something tells me it would get me into trouble if I tried it, and I'd like for a policeman to officially tell me it would be illegal. That would rest my mind.
Anyway, here's my theory:

This is only posted for educational purposes, so if you try it and get into trouble don't go blaming me.
Something tells me it would get me into trouble if I tried it, and I'd like for a policeman to officially tell me it would be illegal. That would rest my mind.
Anyway, here's my theory:

This is only posted for educational purposes, so if you try it and get into trouble don't go blaming me.
Friday, October 17, 2014
SPINNER RACK
I found a spinner rack for $30 at the flea market. I've been wanting one for a good long while but they were always way out of my price range. I see them on eBay for$200-$300 and up in to the $1000s for some reason. All they are is wire and a couple poles. I have no idea why they cost so much.
It's not noticeable at this angle but my spinner rack is Baby Huey heavy.

It's not noticeable at this angle but my spinner rack is Baby Huey heavy.
Saturday, October 11, 2014
PINOCCHIO VS DRACULA in color

In other news, I've just recently completed a 32-page Gold Key style comic book. Now I'm looking around for a printer who does newsprint. That's surprisingly difficult to find these days. Supposedly the newsprint paper is dusty and mucks up a digital printer. It's funny because back in the day newsprint was used because it was cheaper. Now it's more expensive than fancy shiny white paper. I wanted newsprint for nostalgic reasons. If anyone knows where I can get a comic book printed the old fashioned way let me know.
Wednesday, July 2, 2014
SQUATTING MONKEY
A squatting monkey is considered good luck probably somewhere. I'm just guessing. If I'm right then it would be really lucky to have this tattooed giant-sized onto your chest or face. If I'm wrong then you'd have a lot of explaining to do.

This was drawn with black and white pencils on brown paper. Later the brown background was changed to white, and the ground shadow was added digitally.
Thursday, February 13, 2014

Saturday, February 8, 2014
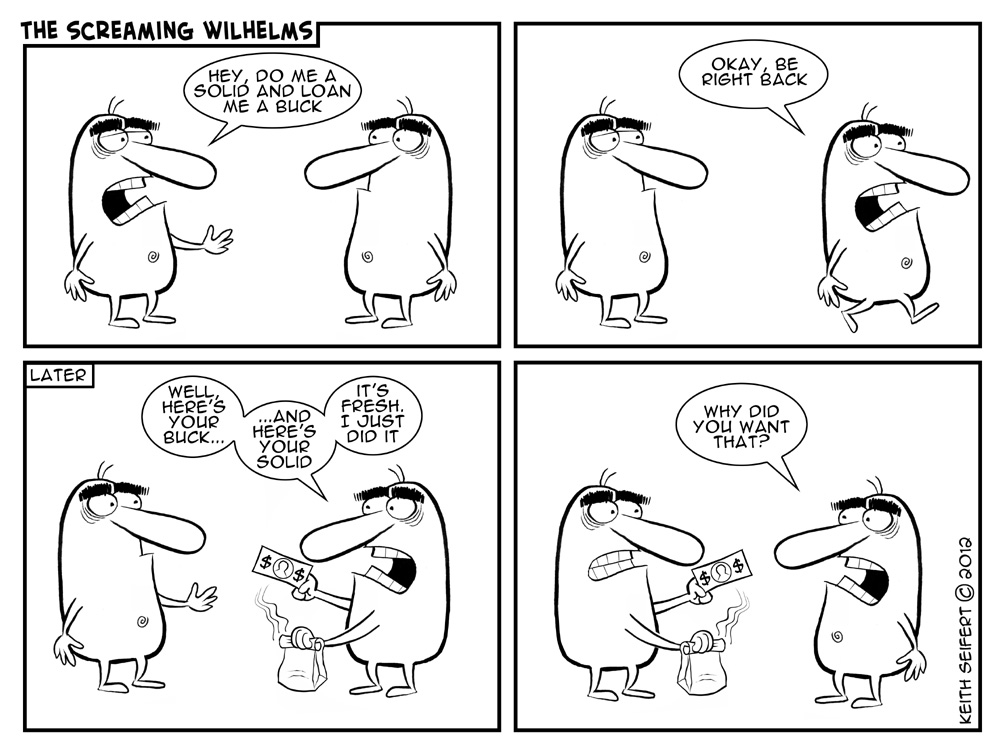
THE SCREAMING WILHELMS #16
Here's the next installment of Screaming Wilhelms. This one seems more like an editorial cartoon rather than a traditional comic strip.

And for those of you who want more reasons to keep looking at it, here it is with a little color in it:

If you'd like to see more Screaming Wilhelms comics, click HERE.
And for those of you who want more reasons to keep looking at it, here it is with a little color in it:
If you'd like to see more Screaming Wilhelms comics, click HERE.
Thursday, January 9, 2014
THE SCREAMING WILHELMS #15
Here's another Screaming Wilhelms comic. It's based on my favorite grade school jokes. I am still slightly fascinated by it.

If you'd like to see more Screaming Wilhelms comics click HERE.
If you'd like to see more Screaming Wilhelms comics click HERE.
Wednesday, September 25, 2013
THE SCREAMING WILHELMS #14

One day my grandpa took Clyde to the vet and the conversation in this comic happened almost word for word. When Clyde came back home that day, he had no idea how recklessly his life had been teetering. My grandpa's unwillingness to part with one more dollar kept Clyde breathing another day.
If you want to see more Screaming Wilhelms comics click HERE.
Thursday, September 19, 2013
Nasty Sinaster

It's fun to draw something after being lazy for so long. A lot of things have happened since my last posts. We moved, I got kidney stones, and gangrene in my appendix. I'm healing up pretty good now and am starting to feel better than I have in a long time. The appendix hurt pretty bad but if I had to vote I'd say the kidney stones were a little more miserable. The appendix only hurt until it was cut out. The kidney stones just kept on hurting and hurting for weeks. I didn't realize this but kidney stones have sharp points all over them and that's why they hurt so bad. The biggest one I had was slightly smaller than a B-B.
The silver lining is I lost a lot of weight! I didn't feel like eating for days on end. I'm sure the weight will come back but while it's off I'm gonna take a bunch of photos of myself doing regular everyday things. Then when I'm old and see the photos it'll look like I was normally a thin person.
Sunday, September 8, 2013
THE SCREAMING WILHELMS #13

If you want to see more Screaming Wilhelms comics click HERE.
Sunday, May 12, 2013
DREAMER
The reason for my lack of drawing posts lately is because I've been spending my time recording songs. I didn't know a good way to post it until now. This is a song I made up called Dreamer. I recorded it using the free Audacity program. I love using Audacity and can't believe it's free.
You might need to let it load for a minute before it'll play.
The drums were created first, out of single hits I downloaded off the internet. I found snare, bass drum, open and closed high-hat sounds, and a crash cymbal. After I got a 2 measure drumbeat constructed I copied it for the rest of the song. Drum rolls were made on a 2nd track.
Acoustic guitars were recorded next. I doubled them so I could separate the sound in stereo. Also the double tracks make a chorus effect.
The keyboard sound is fake. It's created with a tone generator in Audacity. It will make a steady "A" note for you. Then you can chop that up and shift the pitch to make other notes. To make a chord I created multiple tracks of that A-note, and shifted them all to different keys. I added phaser and wahwah effects to the chord to make it sound like an organ. There are tons of effects inside Audacity, and you can search the internet for many others.
Then I did the electric guitar, just a raw signal straight from the guitar, to a line into the mike jack on the computer; no amplifier. The fuzz effects were more Audacity effects.
After the electric guitar was finished I added the bass. It is effect-less other than having the bass EQ pushed up a bit.
Vocals were last, and they were doubled too. Since they were doubled I didn't add echo or reverb to them.
You can record something that sounds like an entire band with only a guitar and a microphone if you don't want to spend a lot of moola. A bass part can be played on the guitar, and then pitch-shifted down an octave. The bass EQ can be raised a little to get it to sound more bassy.
Sunday, March 24, 2013
THE SCREAMING WILHELMS #12

I've got mixed feelings about the identical compositions in every frame. Supposedly repetition is one of the principles of art. My immediate impression is to think it's boring. I wonder though, by repeating an image a bunch of times have I transformed this picture from an illustration into a piece of art? Hey! Alright!
I'm not saying this is art, but if it were pictures of soup cans repeated a bunch it could go for thousands of $$$!
If you would like to see more Screaming Wilhelms comics click HERE.
Tuesday, March 19, 2013
THE SCREAMING WILHELMS #11

For more Screaming Wilhelms comics click HERE.
Saturday, February 23, 2013
THE SCREAMING WILHELMS #10

See more of The Screaming Wilhelms by clicking HERE.
Friday, February 15, 2013
BEST VALENTINE'S DAY GIFT I EVER GOT
A commercial grade popcorn machine! It can make 2 gallons of popcorn at a time! I think it's about 5 feet tall.
 Watch it go!

Sunday, December 30, 2012
MAKE A LASER PISTOL OUT OF A JUICE BOTTLE
How do you work this blogger? I fergit! Although the real reason I haven't posted anything in a while is because of laziness I'm tempted to use "getting a new house" as an excuse. We did get a new house and it left me computerless for a while, but not for five months.
I made a movie prop laser pistol for my yet-to-be-realized movie. I've been planning out a movie now for many years. I've got story ideas but not a complete story, and I have lots of props and friends who are willing to act.
This laser pistol started as a pomegranate juice bottle. Actually 3 juice bottles. Walmart sells 4 different sizes. I epoxied 3 together to make a gradually tapering shape. The logos were removed with acetone and elbow grease.

Step 2: Make the entire gun! Sorry about the lack of pictures up to this point. I didn't think to snap photos until I was pretty far along. The hand grip was carved out of wood. The round part above the hand grip is a plastic wine glass with the stem removed. It was $1 at Target. The long barrel is a candy tube. The clear trigger/body contraption is made from a post-surgery breathing machine.

Here's a view of the back side. I cut part of the wine glass off so I could put batteries in the hole. There's a wooden plug for screwing over the hole. I will glue that cone-shaped clear piece to the back of the wood plug to disguise the flat back of it.

This laser pistol lights up. Here's a string of green LEDs and a battery pack ready to slide into the long tube you saw a few pictures above.

Here's another smaller cheap plastic wine glass. I pulled the base off to use it as a disk for the front "laser-emitting" end of the barrel.

I pulled this off of a Halloween toy. It lights up and blinks and changes colors. It'll go inside that front disk.
This gun will have 2 triggers. One will activate the blinking piece in the photo above, and the other will activate the long strip of green lights. These triggers are on/off buttons from Radio Shack. I epoxied them into holes drilled into the hand grip. The holes meet another hole which travels up into the top compartment. That's how the lights will attach to the batteries.

Here's another one of those breathing machines. If you've ever had to use one then you hate them, and are most likely happy to see one cut up and turned into something else.

The breathing machines also come with a flexible breathing hose. I will use that too.

The juice bottles slide down over the tube like this. I should have mentioned earlier a hole was made in the bottom of each juice bottle before epoxying them all together. The holes are just big enough for the tube.

These little wooden things on the sides are wheels and axles and spools you can buy at a hobby store. I got them at Hobby Lobby. They have lots of various shapes. I don't know what I'll do with them all but bought a bunch of different ones. I don't know what the purpose would be for these things but they seem like they'd be absolutely necessary.

This paint "makes any surface look like hammered copper." It did a pretty good job. The entire body was sprayed, but not the juice bottles.

After the paint dried I applied Minwax dark walnut stain, and then wiped off the high spots so it would look darker in the crevasses. I cut some fake black leather from scrap at work to make a gripper for the palm-side of the hand piece, and attached that with contact cement.

It glows green when the red button is pushed. Intuitive, eh?

For some reason there's a box of old broken radios in the garage. I cut a couple little squares from the circuit boards and glued them to the sides of the gun. I wanted it to look more deadly. Does it help? I don't know.

The last thing I did was put a big wad of leftover colored wires inside that clear flexible hose and glue it to the side of the gun. You can't tell very well from this picture but the wires show through the tube, and make it look as if something really technical must be going on inside there.

It was glossed over in the pictures above but a "crystal jewel" ceiling fan pull was mounted to disk on the front of the barrel. The blinking, color-changing light is right under the crystal so it flickers when the black trigger button is pushed.
After completion I was saddened to learn no real lasers shot out of this gun. All this work for nothin!
I made a movie prop laser pistol for my yet-to-be-realized movie. I've been planning out a movie now for many years. I've got story ideas but not a complete story, and I have lots of props and friends who are willing to act.
This laser pistol started as a pomegranate juice bottle. Actually 3 juice bottles. Walmart sells 4 different sizes. I epoxied 3 together to make a gradually tapering shape. The logos were removed with acetone and elbow grease.

Step 2: Make the entire gun! Sorry about the lack of pictures up to this point. I didn't think to snap photos until I was pretty far along. The hand grip was carved out of wood. The round part above the hand grip is a plastic wine glass with the stem removed. It was $1 at Target. The long barrel is a candy tube. The clear trigger/body contraption is made from a post-surgery breathing machine.

Here's a view of the back side. I cut part of the wine glass off so I could put batteries in the hole. There's a wooden plug for screwing over the hole. I will glue that cone-shaped clear piece to the back of the wood plug to disguise the flat back of it.

This laser pistol lights up. Here's a string of green LEDs and a battery pack ready to slide into the long tube you saw a few pictures above.

Here's another smaller cheap plastic wine glass. I pulled the base off to use it as a disk for the front "laser-emitting" end of the barrel.

I pulled this off of a Halloween toy. It lights up and blinks and changes colors. It'll go inside that front disk.

This gun will have 2 triggers. One will activate the blinking piece in the photo above, and the other will activate the long strip of green lights. These triggers are on/off buttons from Radio Shack. I epoxied them into holes drilled into the hand grip. The holes meet another hole which travels up into the top compartment. That's how the lights will attach to the batteries.

Here's another one of those breathing machines. If you've ever had to use one then you hate them, and are most likely happy to see one cut up and turned into something else.

The breathing machines also come with a flexible breathing hose. I will use that too.

The juice bottles slide down over the tube like this. I should have mentioned earlier a hole was made in the bottom of each juice bottle before epoxying them all together. The holes are just big enough for the tube.

These little wooden things on the sides are wheels and axles and spools you can buy at a hobby store. I got them at Hobby Lobby. They have lots of various shapes. I don't know what I'll do with them all but bought a bunch of different ones. I don't know what the purpose would be for these things but they seem like they'd be absolutely necessary.

This paint "makes any surface look like hammered copper." It did a pretty good job. The entire body was sprayed, but not the juice bottles.

After the paint dried I applied Minwax dark walnut stain, and then wiped off the high spots so it would look darker in the crevasses. I cut some fake black leather from scrap at work to make a gripper for the palm-side of the hand piece, and attached that with contact cement.

It glows green when the red button is pushed. Intuitive, eh?

For some reason there's a box of old broken radios in the garage. I cut a couple little squares from the circuit boards and glued them to the sides of the gun. I wanted it to look more deadly. Does it help? I don't know.

The last thing I did was put a big wad of leftover colored wires inside that clear flexible hose and glue it to the side of the gun. You can't tell very well from this picture but the wires show through the tube, and make it look as if something really technical must be going on inside there.

After completion I was saddened to learn no real lasers shot out of this gun. All this work for nothin!
Tuesday, July 3, 2012
"EVIL MIND" word trickery!
I never have enough evil stuff on this here blog of evil. Being determined not to keep going on like that, I sat and brain-grunted until some evil finally squeezed out.
I have 3 versions here. It says EVIL MIND, and when you turn it upside down it still says EVIL MIND.
I incorrectly call this a palindrome. I was told the last time I posted some of these this is called a "reflection."

I've been trying to think of something I could put this on. It would be best if it were something which flipped upside down, and rightside up, and was head-related. Maybe a hat, but I don't know why someone would wear a hat upside down. I need some brain-storming ideas. Does anybody have any?
Wednesday, June 13, 2012
MUSTACHE-MAN

I thought it would be reeeeally dumb if there was a superhero called "Mustache-Man" who was covered in mustaches, but didn't actually have a real one on his lip.
Sunday, May 20, 2012
MISSING PANEL COMICS #1
Here's number one of "Missing Panel Comics." I hope to make and post more in the near future.

"You Can't Wear a Necklace if You're Neckless"

click pic to enlarge
Friday, May 11, 2012
I AM FORB-ESS
This is an old drawing I found. I'm not sure if I've posted it before and I'm too lazy to check if I did. If you've already seen it and now you're looking at it again, I am so deeply and truly sorry.


Saturday, May 5, 2012

Tuesday, May 1, 2012
THE SCREAMING WILHELMS #8
And another! And as always, sorry in advance. Click image to enlarge.

There are a lot more Screaming Wilhelm comics where this came from. Look HERE for more.
Sunday, April 29, 2012
THE SCREAMING WILHELMS #7
It's been a while since I posted any cartoons. Here's the next in the ever-growing line of Screaming Wilhelms comics. Click to enlarge.
 Filmed in a new process called ANNOY-O-VISION. There are more Screaming Wilhelm comics if you are a jerk enough to want to look at them. Click HERE, jerk.

Tuesday, March 20, 2012
"OCTOPUS GLOVES" SONG
Here's a song my brother and I made some years back (in the days of cassette tapes), based on some drawings made by Bob Canada.
Click HERE to listen to Octopus Gloves
These are the words if you can't make them out:
Click HERE to listen to Octopus Gloves
These are the words if you can't make them out:
Bob was rockin' when he fell in loveBob's drawing of Roy, the gym teach with rabid poodles for hands
She was wearing Octopus gloves
Tentacles around his neck
Love is just an inky cloud of death
Bob had a killin' urge when he was just a boy
He had a mean gym teacher by the name of Roy
Roy was just a lady's man
He had rabid poodles for his hands
Bob
Bob
Bob
Shishka Bob
Klingon women cling on him
The only thing he says to them: Ka-Pla!
Saturday, March 3, 2012
DISASTER IN LIVING ROOM
This kind of thing happens every day here in Eville Indiana. It was exciting at first but now I'm bored with it.
Actually if you don't already know this is a phone app you can get for free. It's called Action Movie FX.
Actually if you don't already know this is a phone app you can get for free. It's called Action Movie FX.
Wednesday, February 22, 2012
DANCING SKELETON PUPPET
I saw this video a while back but had forgotten how good it was. Even knowing it's not real, it seems absolutely real to me. He's got personality and stylish moves. I like the second half of the video best. He looks into the money hat and then weeps at the pitiful amount. I also like how he stops everything he's doing to take the time to watch the pretty girls walking by. Too bad the Ed Sullivan Show isn't still on. I bet this skeleton would have been a huge hit back then. It's somewhat depressing to know a puppeteer this talented isn't already rich and famous, and is reduced to working street corners.
Monday, January 30, 2012
MORE CHINESE WOODCARVINGS
I love these things. They're carved from large bamboo roots. The ridges of the root and the little hairy root stragglers and feelers are incorporated into the designs too. Each one has to be unique to fit around the shape of the bamboo root they're working with. This one has glasses frames and little whiskers, all from a single piece of bamboo.

Since bamboo has hollow segmented sections they don't have much surface to work with for their designs, but you'd never know it by looking at them. These things fascinate me. Having done some woodcarving myself I realize how difficult and intimidating it would be to do something like this. You'd have to have your plan worked out from beginning to end before you ever started. If you went too deep and punctured through to the hollow middle you'd ruin the entire project.

Look at this tiny bicycle made out of wood! Look at it! Those spokes are thinner than toothpicks. The entire bicycle was around 7 or 8 inches tall from what I remember.

I couldn't get close enough to pick up the detail with my camera, but you can kind of get an idea. When I looked at it in person I remember the pedals and how it looked like they would really turn.

I think this started out as a hollow log, and they carved it into a net with lobsters all over it. Everywhere you looked you could see thin, fragile slivers of wood and tiny details. How they did that without breaking it I'll never know.

Here's a closer view. This piece was pretty big. The lobsters were basically full scale. I think the entire thing was taller than me. I couldn't look at the back side since it was in a glass case, but it looked like there were hidden details down inside it too.

Sunday, January 29, 2012
NUT CARVING
These are little carvings I saw in China. They're made from nuts.

I bought a couple. I'm slightly nervous about them. I wonder if insects will get at them since they are edible.

Maybe they aren't edible. I'm not sure. They may be more like seeds.
EXPLANATION FOR MY ABSENCE:
I haven't posted in a while because I've lost about 20 hours of my free time with a new job. I quit Karges Furniture because I had a good offer at another place. I loved Karges but I thought I should give this new thing a shot. It's tough getting used to after being at Karges for 21 years. That's half my life. So far, at the new job I've designed furniture for Bar Louie, Western Sizzlin', Holiday Inn, the Army and a bunch of other places.
It's a pretty big culture shock from what I've done in the past. At Karges we had 6 months from the time someone ordered a piece to the time we shipped it. At the new place we have a few weeks. A lot of times we are still slapping the furniture together when the delivery truck arrives, and the driver will have to sit and wait for us. With each job it feels like there's no way we'll make it on time, but somehow it always manages to get done.
So that's what happened.
Subscribe to:
Posts (Atom)