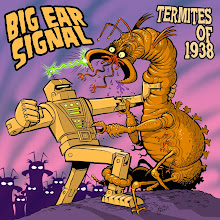
 First I applied a bead of dark blue paint to the top half of the canvas, and a lighter blue to the bottom half. I blended them by wiping the canvas back and forth with a large brush, starting at the top, and working my way down. When I got to the bottom, I reversed and went from bottom to top. I repeated these steps until I got a smooth gradient. I let this dry.
 I thinned down some purple and created a wash. I brushed all the shadow areas on the lower right sides of all the objects. This step is kind of like shading something with a pencil. The more coats of purple wash I applied, the darker it became. I let that dry. I used a hair dryer to speed up the drying time.
 This step was fairly subtle and maybe even unnecessary. At the time, I didn't feel there was enough of a gradient in the bean-shaped bodies, so I found a green lighter than the base color, and thinned it with water. I brushed the left halves of the two bean shaped bodies and let that dry.
 I watered down some yellow to create a wash for the highlights on the upper left sides of the objects. Same as the shadow wash, the more coats I applied, the less transparent and more saturated the yellow became. I dried each coat with a hair dryer before applying the next.
 I needed the figures to stand out from the background so I created a secondary light-blue light source. I didn't thin this paint down. I used it straight from the tube and just hit the lower right edges of the objects.
 With a thinned down orange wash I brushed on a laser blast. Also I brushed some of this wash onto the shot alien's head as if the laser glow was flashing onto him. I let that dry.
 With the same orange paint, NOT THINNED, straight from the tube, and painted a thinner laser line in the middle of the previous blast line. I used this orange also to hit spots on the aliens where the shine of the laser would touch them, such as the gun itself, and the shot alien's hand, and the shooting alien's foot and fingers. I put a dot of it on the emitting ball of the gun too. I let all that dry.
 I used pure white straight out of the tube to do the hottest center core of the laser flash. I put a very tiny speck of it in the center emitting ball of the gun.
 Since the bulk of the painting is blue, with some leanings toward green, To make the letters stand out, I made them orange with some leanings toward red, which are the most contrasting hues on a color wheel.
 I painted red outlines on the letters. Instead of using a reddish-orange, I shared out the 2 colors by having orange be the base, and red be the outlines.
 The last step was to paint the stars and planets. It's easy to go overboard with this step. Some stars should be brighter than others (controlled by how much water is added to the paint.)
And that's pretty much it!


Awesome! It's very helpful to see the process. That blue rim light really helps sell it.
ReplyDeletethanks for the comment!
ReplyDeleteThat's a really cool step-by-step process you got there. Very helpful. Thanks for taking the time to do it. And love your work.
ReplyDeleteThanks, JunkyKid! I checked out your work and it's very terrific!
ReplyDeleteThere is no end to your talent is there? I am intimidated by your awesomidity, truthfully.
ReplyDeleteThanks buddy! Wow!
ReplyDelete