Wednesday, December 29, 2010

ELECTRIC GUITAR PROJECT part 24

I'm closing in on the final stages of this guitar. I never imagined it would take this long.

There needed to be an access port in the back for the electronics and wires. A circular recess was routed out, and a lid was made to fit into it.

The lid has a small lip around it to overhang the routed edge in the body. The lip is secondary piece of 2-ply veneer added to the disk of wood.

Here it is in place.

Next a hole was cut big enough to hold the volume knob. Then a little hole was drilled for it to poke through the face on the other side.

It also has extra space around the volume knob so wires can be crammed around it.

There it is protruding out of the face.

The next step was to make worm holes connecting all the components to this chamber. This hole leads to the pickup slot.

It comes out here. See that big ol' hole? Even though the wires are thin it will be a lot easier to wire it up if the hole is ridiculously huge.

Size comparison to a wiener dog.

Also it needed a hole leading to the bridge so a ground wire could be ran to it. That was a smaller target so I made crosshairs with a pencil. Then I'd have an idea as to which direction I should drill.

Woohoo! I was sort of expecting my drill bit to bottom out and never connect to anything, or poke through the middle where the laminated strips are running, but it worked.

Then a slot was cut out for the jack plate. I was stumped as how the jack plate should run in the last guitar post, but since then I've made the painful decision. I hope I don't regret later. It's too late now. It's just wood so the worst that could happen is I'd have to glue in a patch and do something different. I don't think it'll be too bad though like this.

And since there's a jack plate there needs to be another worm hole leading to it. This chamber sure did get worm-holey fast.

POP! There it is! And that's it!

Oh, wait. One more step. Holes were drilled in the lid to attach it to the body.

Since the holes aren't measured at exact quadrants and I don't want to accidentally forget and try to align the wrong holes with the wrong holes I made myself a secret note.

Since it's Winter Lucy likes to do this a lot. She pulls the blanket out of her bed and drags it over to where everybody is gathered, and then grunts and squirms and wriggles until she's gotten herself under it. Notice she's in a different blanket than the one up a few pictures. That's because she vomited in that earlier one. She gets sooooo comfortable in her blanket she's not willing to get up and vomit somewhere else. Nice, huh? It's hard to get mad at her though. She's old.

Sometimes she covers up completely and I forget she's there. I can't count how many times I've tripped over a lump like this.

Believe it or not, I think I'm actually done with all the woodworking on this guitar project. All that's left now is staining, lacquering and then soldering the components together.

Friday, December 24, 2010

MELBA SNARCH #2

Merry Christmas! Here's something completely unrelated to help celebrate:

Could this be the end of Melba Snarch?

Thursday, December 23, 2010

ELECTRIC GUITAR PROJECT part 23

Step 23 of my guitar project:

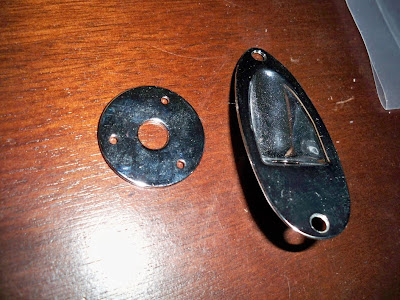
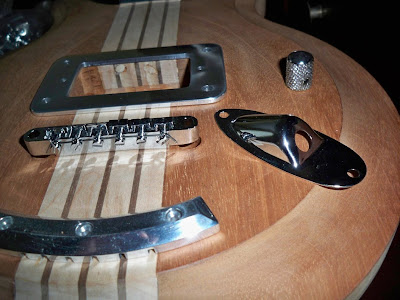
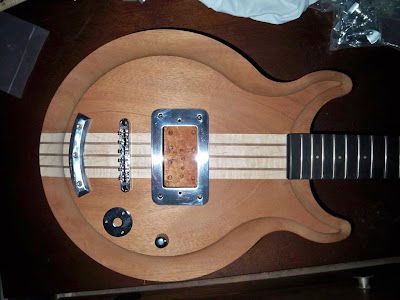
I've got another decision to make. I need to choose between 2 kinds of jack plates. Visually the flat circular jack plate is nicest. For usability though, the angled plate is way better. The flat plate would shoot the wire straight up in the way of my hand while I tried to play it. The angled plate kicks it down and out. Lots of guitars have the jack plates in the edge of the guitar but since this body has such a deep shape I don't have enough room to do that.

Another problem: The angled plate is too big for the space it would need to fit into. It bumps the pickup plate and still hangs over the break of the body's shape.

A possible solution would be to turn the jack plate backwards and upside down. Then I'd have a convex plate rather than concave. Then the extra length of the plate wouldn't be needed and could be cut off.

This is what it would look like with the flat circular plate.

And here's how the angled plate looks.

And here's a digital simulation of what it would look like after I removed some of the metal and rebored it.

It's a weird nontraditional way of doing it, but the idea is starting to grow on me. Alternatively I could stick the jack plate in the back of the body but then the wire would always be in the way of my ever-growing gut.

Thursday, December 16, 2010

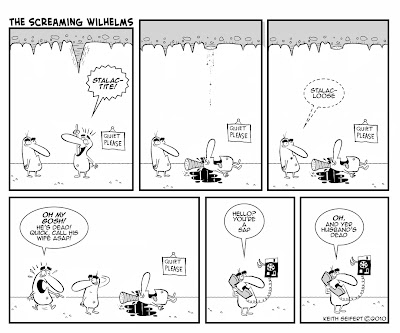
TWITTY WIDGIMS (The Screaming Wilhelms #2)

Here's another Screaming Wilhelms comic. The 1st one can be seen HERE. I wonder if this comic is going to make people blink 2 times (like they do in animated cartoons) rather than laugh. Hopefully it makes sense.

I like the long pause (2 staring panels) in the above cartoon, but if I want to make this more comic book format friendly maybe those could go, and it would be like this:
Learn about, and hear the real Wilhelm Scream.

Tuesday, December 14, 2010

ASAP! (The Screaming Wilhelms #1)

This is the very first Screaming Wilhelms comic. There will be more to come.

Sunday, December 12, 2010

ELECTRIC GUITAR PROJECT part 22

Another installment of the guitar that never quits being unfinished.

Previously, I put veneer around the headstock, and now it's time for the face to be veneered. This job made me nervous because I've never veneered anything before.

With much uncertainty I used masking tape to hold these 3 pieces together, and then took a deep breath and fearfully applied them with contact cement. Then I removed the masking tape and this is what I had.

Here's the back view. I allowed plenty extra veneer for trimming just in case I didn't measure something right.

I loaded up all the pieces with plenty penciled-in center lines and guide marks. That helped a lot.

After everything was good and cured I trimmed off the excess and was relieved to find it was actually centered like I wanted. What is going on? Nothing is ever that simple or easy!

The bad news. I was right; nothing IS ever that easy. I pierced the veneer where the tuning pegs holes were and saw they weren't centered properly. The veneer was right but the holes were in the wrong places. It never showed up until I put the veneer on it. I don't think it's a big problem though, and I may inlay a thin line of walnut veneer to shift the balance of the pattern just a tad. If I put the inlay to the left of both lines it should hide everything well enough.

Here's a panorama shot of my desk at work.

I've been wondering how well that camera would do taking a vertical panorama picture of myself. Now I know. This will go on my list of Things to only try once.

Friday, December 10, 2010

ELECTRIC GUITAR PROJECT part 21

While deciding on a veneer layout for the headstock, I went ahead and finished the plate to hold the Pickup onto the guitar body. A piece of aluminum was sliced down to 1/8" thick on a band saw, and the opening was routed out in the middle. Then the corners were rounded and holes were drilled.

After that, it took about 2 hours for me to smooth up the band saw marks and make it flat. I started with coarse 60 grit sandpaper and progressively went to finer grits. The last was 600 grit. Since the plate was thin I ended up sanding off my fingernails while trying to hold it. I should have made some kind of jig to hold it, but that would have meant a trip waaaaaaaay out to the garage. Eventually after I couldn't take it anymore I put on some work gloves and that helped.

When the sandpaper work was done I shined up the plate on a polishing wheel. It's difficult to get a good picture because the flash makes it glare, but it looks like chrome. I'm pretty happy with the way it turned out. To cut down on hums, electronics chambers can be shielded and grounded with aluminum foil. The nice thing about using aluminum instead of wood or plastic for the plate is now I'm halfway there as far as shielding goes.

Here are the work gloves afterwards. They were new when I started. To a lesser degree my fingers kind of look like that too.

Here's something unrelated. Mei wanted an exercise hula hoop, and we found out they were $50 if you get the size and weight she was looking for. We made this one instead. You get some bendy PVC pipe, and a coupling link. We put 5 pounds of wire cable inside to make it heavy. TADA! It was about $8 total. She's been using it every night.

Monday, December 6, 2010

ELECTRIC GUITAR PROJECT part 20

I can't believe I'm up to 20 steps on this guitar and it still isn't finished. Last time I put some veneer around the edge of the headstock. Now the plan is to veneer the top face of the headstock. I haven't got it all figured out just yet but I'm getting there.

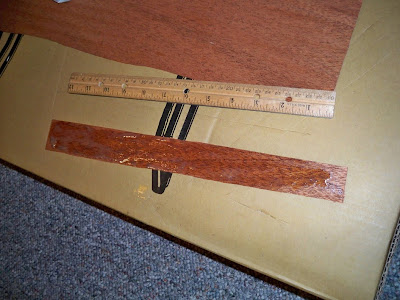
Here are some scraps of variously colored veneers. (It's an early picture before the headstock was veneered around the edge.)

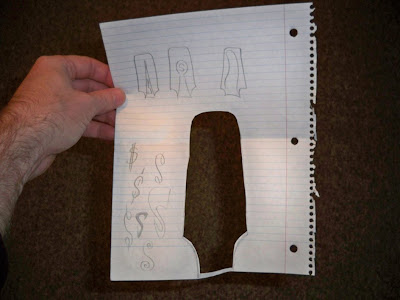
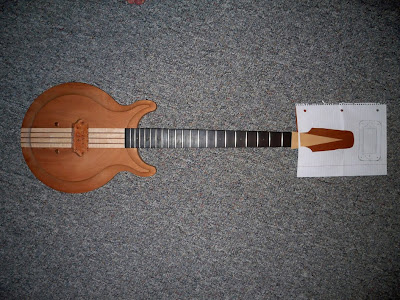
I traced the headstock shape onto a piece of paper and cut it out to make a mask for viewing veneer arrangements.

The idea of a triangular wedge pattern is what I'm hoping to successfully pull off. Bear in mind I've never veneered anything before and it could result in horrible disaster. The worst that could happen is I have to sand it all back off and try again. That's assuming I don't have some kind of conniption fit and fling the whole guitar into the nearest brick wall.

Here I've arranged some pieces together and laid the paper mask over the top to get an idea of how it might look.

When I got a pattern I was happy with I cut some over-sized maple and mahogany pieces to fit together like a puzzle. I cut them on an office paper cutter. It sliced though the veneer very nicely and made a good clean cut.

If all goes well it'll look kind of like this.

As an alternative I could flip the triangle upside down and do it like this.

Both ways have their good and bad points but I think I like the 1st version best. The 1st version lends itself well to having a decorative symbol or logo in the middle of the white triangle. I guess there could also be one in the second version too but the strings would sort of obscure it.

I think I also need to be careful the tuning peg holes won't disrupt the pattern. It's a dilemma, dang-gonnit! This is what happens when I don't plan things out from the start.

Saturday, December 4, 2010

PRETTY AWFUL


I never realized how weird English was until I started trying to teach it to Mei. One time she said "No do that" to Lucy and I told her she's supposed to say "Do not do that."

She asked, "Why do you say DO two times?"

I couldn't think of a good reason other than it just sounded better. Mei's way is much more simple and streamlined. Maybe in the distant future people will say it that way.

The word PRETTY means LOVELY, but can also mean KIND OF.

The word AWFUL means TERRIBLE, but can also mean VERY.

I made the above chart to teach Mei the different usages of the two words. It took me about an hour and a half to get it done. It only took her 10 seconds to look at it. I hope she appreciated it.

Here in Southern Indiana we shorten the word AWFULLY to AWFUL, so we say "She's awful pretty." I'm curious if that's how people say it in other parts of the country, or if that's just our local hillbilly talk.

Friday, December 3, 2010

ELECTRIC GUITAR PROJECT part 19

Part 19 of my guitar project:

In the last post I mentioned how I was unhappy with the way the laminated wood looked on the headstock.

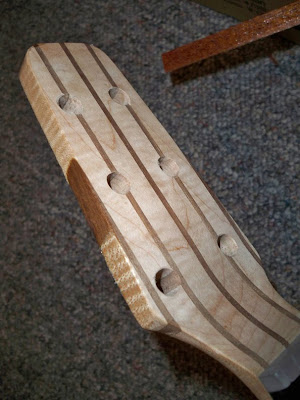
I'm going to cover the headstock with veneer. I'll start with the edges first, and then do the face. That way it'll lap over and look better. Here's the way the headstock looks currently. Since the contour of the headstock cuts diagonally through the walnut/maple lamination there's a large ugly stripe of walnut right in the center of the edge. That bugs me every time I see it.

I brushed some contact cement onto the edge of the headstock.

Also I brushed contact cement onto a strip of mahogany veneer. Then I let both pieces sit and dry to the touch (for about 15 minutes.)

After both pieces dried I wrapped the over-sized veneer around the edge of the headstock using a big heavy hardback book. I only had one shot to get it right. As soon as the pieces touched they were permanently bonded together. There was no opportunity for sliding pieces around to align them like you have with regular glue.

After the glue cured overnight I used a knife to trim the excess flush with the headstock. Done!
Next time I'll put some veneer onto the face.
I have no idea what it'll look like when it's veneered. The nice thing about working with wood is if you don't like it you can always sand things back off and try again. Hopefully that won't need to happen.
Related Posts with Thumbnails